Monday, June 16, 2014

Brownie Bomb Recipe

You can just go ahead and thank me now. This recipe is out of this world!
Brownie bombs have been my go-to party contribution for the past while.  What's not to love... cookie dough, brownie, chocolate...everything about these little guys is amazing.  So here is what you need:

Ingredients:
  • ¾ cup softened butter
  • ¾ cup brown sugar
  • ¼ cup white sugar
  • 2 Tbsp milk
  • 1 tsp vanilla extract
  • 2 cups all-purpose flour
  • Pinch salt
  • 2 cups miniature chocolate chips, divided
  • 2 boxes fudge brownie mix, baked and cooled
  • 1 package chocolate almond bark
For the purpose of the tutorial, I did a half batch of this recipe, which yielded about 16 brownie bombs.

Make the brownies per the recipe on the box. They need to be totally cooled before we can wrap the cookie dough, so I normally do this an hour or so before.

Now we need to make the dough. Cream the softened butter with the sugars until light and fluffy. Stir in the milk and vanilla extract.  I always add an extra teaspoon or two of vanilla because I love the way it adds to the dough.  Combine your salt and flour together, and slowly mix it into your dough.  You may need more or less flour to get the right texture.  It should be firm and together, but still a little on the wet side.  Gently stir in 1.5 cups of the mini chocolate chips. We will need the last half cup for the last step.

This dough is made without egg, so it is safe to eat at any point. I have made just the dough before and used it as a "dip" with graham crackers. I highly suggest this as well.

 Roll your cookie dough into balls about 1 inch in diameter.  Throw them in the freezer for about an hour until they get nice and firm... the colder they are, the easier the next step will be.

 Cut the brownies into squares about 1.5-2''.  It's hard to see in the picture, but I always cut away the hard edges since they are hard to wrap around the balls.  Flatten the brownie with your hand so it is nice and flat.

Put one of the frozen cookie dough balls in the middle of the smushed brownie.  Wrap the brownie around the dough ball until it is mostly covered.  It doesn't need to be perfect since we will be covering it in chocolate!

Once all of the frozen cookie dough balls are covered in brownie, throw them back in the freezer.  Again, freeze the bombs for at least an hour.

Prepare the chocolate almond bark per the package directions.  I usually use a double boiler, but a microwave works just fine.  Be careful not to scorch your chocolate, or you will have lumpy brownie bombs.

After you dip the bomb in chocolate, lightly sprinkle the tops with mini chocolate chips.

There you go!  Like I said... these brownie bombs are amazing. Store them in a sealed container in the fridge, and they will last for about a week. I prefer them to sit on the counter about half an hour before serving so the cookie dough gets nice and soft.

I hope you enjoy them!

Thursday, June 12, 2014

Weekly Cleaning Schedule

I love having a weekly cleaning schedule. I feel like it keeps me from having to binge clean by accomplishing little tasks each day. Here is what my weekly cleaning schedule looks like:
Each day has a simple task to complete:

Sunday - Meal Plan - I read through ads and look at coupons to plan our meals. I have gotten really efficient at this, and typically can get a month's worth of planning done in one Sunday.  All that means is that for the most part, my Sundays are spent not doing chores.
Monday - Kitchen/Bedrooms - This is the day I do a deep clean on the kitchen... things like cleaning the microwave and dishwasher, wiping cabinets, bleaching counters, etc. In the bedrooms, I make sure that everything is picked up.
Tuesday - Laundry/Dust - I do all of my laundry in one day. I know some people that do weekly cleaning schedules spread it out so they are only doing a load each day.  It's just personal preference. For dusting, I make sure all of the main surfaces are dusted. Things like the fan and blinds get done monthly.
Wednesday - Windows/Shopping - The windows get a quick wipe down each week, but the outside windows are done monthly.  I try and always do my shopping on Wednesdays. These are double ad days at Sprouts, so it helps keep the cost down.
Thursday - Bathrooms - Pretty self-explanatory. I only have 2 bathrooms, so this cleaning always goes quickly.
Friday - Floors - Each week I vacuum and spot clean the floors. Every other week I bust out the mop after I vacuum.  
Saturday - Makeup Day - Makeup any day that you might have missed. 

For the most part, each daily task is done in 30 minutes or less. Of course some of this has slowed down since I've become pregnant, but staying close to this schedule makes for a pretty clean house.

I like to display my schedule in a frame. I have various magnetized frames on my fridge with things like my cleaning schedule, a weekly menu, and a monthly calendar. It's organized, doesn't take up a lot of space, and I love it.

I'll try and put together a post about my monthly cleaning tasks. Let me know what you think!

Wednesday, June 4, 2014

5 Minute DIY: Onesie Applique using the Silhouette Cameo

I have plenty of plain, boring onesies for Miles that I think needed some sprucing up. Here is a quick and easy tutorial using my favorite machine... The Silhouette Cameo.
5 Minute DIY: Onesie Applique using the Silhouette Cameo | House of Hibbs 
What I love about the Silhouette is that I can make custom shapes and use it for anything... clothes, scrapbooking, vinyls... the list is endless.

 You need the following for this project:
  • Onesie (Here I use a white Gerber 6-9 month onesie)
  • Fabric of your choosing
  • Heat and Bond
  • Silhouette
Start by measuring out your fabric and Heat and Bond. I use sheets of 9''x11'' of each. Make sure and iron your fabric before you lay the Heat and Bond! Put the Heat and Bond transfer side down on top of the fabric.

Iron according to the package instructions. With the type I chose (Permanent, non-sew Heat and Bond) I pressed firmly for 3 seconds until bonded.

In the Silhouette software, choose your shape. I picked out an outline of Texas... super easy shape to cut. I've done many projects with words and more intricate shapes, but for the purpose of today I picked a simple one. Make sure you set the size of you page (9''x11") and size your design so that it will fit on your surface. (I used a shape about 5''x5'')

I've put a picture up of my cut settings. I have found that using the Fabric setting with a Double Cut is the most efficient. If you are using a heavier fabric (like canvas) make sure and adjust accordingly.

 
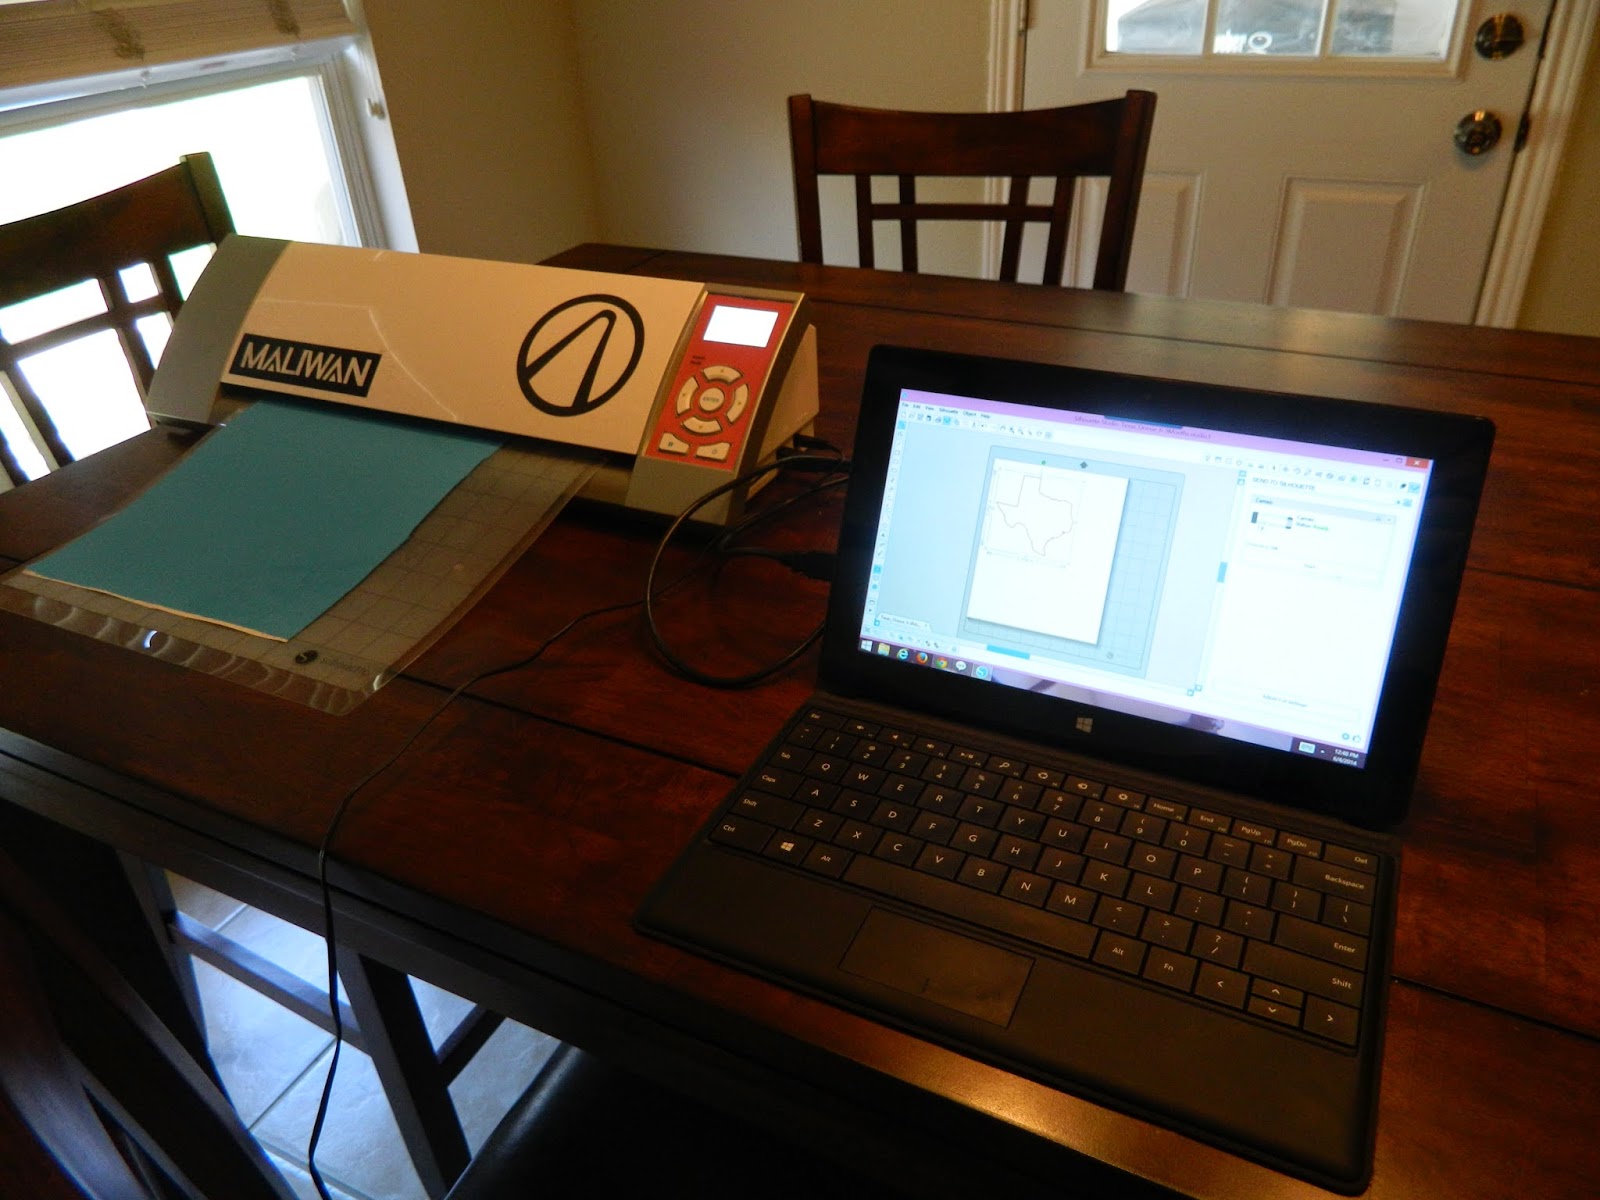
Here is my wonderful workstation. Make sure you have enough room behind your Silhouette so nothing hits the cutting mat.

Here is the fabric after it has been cut. Hard to see anything, but when you carefully peel off the rest of the fabric...

 Magic! A perfectly cut little Texas.

Carefully peel the fabric away from the white backing. The fabric applique will have a little sticky texture on the back. This is the side that will go down on the onesie.

Place and iron as directed by the Heat and Bond instructions. (8 seconds for me). Since I used permanent Heat and Bond the onesie can be run through the washing machine with no damage to the applique.
There we go... a 5 minute project that turns a plain onesie into something a little more interesting.